See Beyond Tech

  • Subscribe to our RSS feed.
  • Twitter
  • StumbleUpon
  • Reddit
  • Facebook
  • Digg
Showing posts with label tip. Show all posts

Sunday, 6 February 2011

How to Stop Yourself From Getting Distracted/Procrastination

Posted on 18:25 by Unknown
For me, procrastination often occurs as a result of distraction. Although, the distraction is often a byproduct of the difficulty of a task (such as homework/projects), distraction is still the main reason why a lot of work is often left undone. If you're like me and need a little help to keep yourself away from lifesucking websites such as digg.com, xkcd.com and so on... you'll love these little apps which I'm about to mention here. What they do is fairly basic: block the internet. Of course, you could just disable your internet connection yourself, but who has the will power to do that?


Selfcontrol (free; Mac only, Linux alternative here): This app pretty much only does one thing. Prevent you from accessing the internet for a set period of time without allowing you to overrider the disconnect. Essentially, if you have to reconnect before the timer runs out you'll have to change around some system config files. While I've only tried this a handful of times, I'm surprised to say that it does work... but it takes a lot of willpower to click on the start button. Also, it might be a good idea to turn off the iPhone/BlackBerry/other Smart Phone as well, incase you get tempted to use that instead.


Freedom ($10; Mac and Windows): Like Selfcontrol Freedom offers similar abilities of being able to disconnect yourself without an option to reconnect before the timer is done.


While I think that these applications alone may not help you get rid of your habit of browsing youtube videos or checking Facebook videos, they may prove to be helpful when you're really under a deadline and can't afford getting side tracked even for a few minutes.
Read More
Posted in downloads, tip | No comments

Sunday, 23 January 2011

Fixing Time Machine Backup Errors

Posted on 20:43 by Unknown
Recently, I had been getting an error from my Mac's Time Machine as follows:

The backup was not performed because an error occurred while copying files to the backup disk. The problem may be temporary. Try again later to back up. If the problem persists, use Disk Utility to repair your backup disk.
That pretty much kept telling me that it couldn't perform the back up.

At first I thought it was a problem with my back up disk as Time Machine had mentioned. So I did the following:
  1. Deleted the Time Machine partition on my back up disk through Disk Utility
  2. Repaired the back up disk
I tried the process again, but it still gave me an error. 

After searching for similar problem, I came across some posts that advised to disable spotlight indexing, but that didn't seem to help. Finally, I stumbled across a post that mentioned the use of the OS X console application to see what was wrong. 

Through the help of the Console application (which can be found in Applications > Utilities > Console), I was able to determine that what happened whenever I started a back up was that it would give me a error message whenever it tried to back up a particular file. Turns out that the file was locked, and could not be copied by Time Machine, so it kept saying that there was a problem with the back up disk.  Deleting this file fixed the problem, and it seems like Time Machine is backing up things just fine right now.


Read More
Posted in Mac, tip | No comments

Saturday, 24 July 2010

Converting Adobe PDF Files to Text or HTML

Posted on 20:07 by Unknown
Chances are that you come across a lot of PDF files everyday, at work, school or home. PDF (which stands for Portable Document Format by the way) files are great as they often preserve the formatting of the text even if you don't happen to have a font installed. They also preserve the layout and images in the document. Also, it's free to create PDF files from several applications like OpenOffice, Microsoft Office and you can usually even print web pages to a PDF file.

However, one big problem with a PDF file is that you need a PDF reader to view it. Although Macs, and GNU/Linux based PCs come with individual readers, and Adobe's reader is a free download for windows users, other platforms sometimes don't have readily available or free readers.


For instance, BlackBerrys, iPhones and many other portable devices don't have a full fledged PDF reader built in. So, ironically, the PDF file isn't so portable after all, since you're out of luck when it comes to a mobile device.

However, sometimes there are files where the content is more important than the layout, and the content is mostly text (like ebooks or project instructions or a letter). In such cases it is often more desirable to just have a text file or a html file instead.

Luckily, Adobe provides some really easy ways to convert the PDF documents.

Option 1: Email To convert a PDF to text, simply email the document to pdf2txt@adobe.com! After converting the document, the service will email you back with the text file attached. Similarly, you can also email a PDF to pdf2html@adobe.com and you'll receive a html file attached in the returned email instead.

Option 2: Online Link to the document Alternatively, if the document happens to be online, you can visit Adobe's online conversion tools page, and convert the documents from there.
This way, if it's something simple like a file full of text, you wont need a PDF viewer to view the information in it. Plus, if you happen to need raw data (for a program that you may be writing, say) from a PDF file, this in a great way to convert the file!
Read More
Posted in adobe, tip | No comments

Thursday, 22 July 2010

Taking notes on a BlackBerry While Calling Someone

Posted on 18:54 by Unknown

So, you're on the phone with your friend, and your friend says "so, I'm like, so, like, hungry right now, want to meet me for lunch at this cool new place?". And then you say, "Sure, just let me know where it is". And then your friend starts telling you: "Okay, so walk 5 blocks south from King and Younge, and turn right and go down the dark alley but..."

What happens when you don't have a pen and paper handy to write down the instructions?

No worries, if you have a blackberry, you shouldn't have a problem taking notes, even while you're talking on the phone with your friend (some conditions apply since you will have to type out the notes somehow).

Here's what you do: If you're not on a headset, tell your friend to wait because you'll have to push some buttons first before you can take notes.

First, hit the blackberry home button, causing a menu to pop up. Then, click on the Notes option.

Now in the blank space start typing the notes. You might have to put your friend on speaker as you type the information, but at least this way, you won't forget it.

Once the call is done, it should save the note along with the call details, which can be accessed form the same place as your email messages. Consequently you can easily find the note just by looking at your call list, so you should have no trouble figuring out which note was for which call.

That's it. Happy note-taking!

Read More
Posted in blackberry, tip | No comments

Sunday, 11 July 2010

Switching to the DVORAK Layout

Posted on 17:51 by Unknown
For me the main method I use to interface with the computer is typing (for now at least). I use the keyboard almost every time I'm at a computer, save for the few occasions where I only need to check something quickly, and even then I most likely need to login by using the keyboard first.

However, for years, unknowingly, I (and possibly you too) have been using a keyboard layout that is more than a hundred years old! The QWERTY keyboard layout, as many of you probably already know was first created for the typewriter, when the typewriter was primarily a mechanical machine that depended on gravity and springs to do its job. It was designed mainly to slow you down (which makes sense since there are no vowels in the home row -- almost every word in the English language has a vowel), to ensure that the keys don't jam (even though I'm sure that they sometimes did). Have you ever wondered if there is a better way of typing?

Turns out there is: its called the dvorak typing layout, and it helps you type really really fast. Just ask this lady (actually, you can't anymore, but her world record typing speed speaks for itself).

The best way to get started with this new layout first, and see if you are sold. You can do so by checking out the dvorakzine and perhaps read about it on the interwebs. Then you should try out the layout for yourself. But even at a basic intuitive level, having the vowels nearby just makes sense.

If you want to get started, I'd recommend you first start with some typing practice (a basic course in dvorak is probably your best bet), and learn the layout a little by little. Almost every operating system lets you change your layout quickly, so QWERTY will never be too far away.

But before you switch, here are some things you should know:

  • It'll naturally feel awkward typing on a qwerty layout once you get completely used to the dvorak one. If you are at a workplace where your system administrator will not allow you to switch layouts, you might just have to stick to qwerty for you entire life
  • It's better to switch when you are still a student (and work mainly on your personal computer where you have full control over your keyboard layout)
  • You'll never want to type on qwerty anymore
  • No one else will be able to use your computer (until they figure out how to switch the layout back to qwerty that is)
  • Your typing speed may improve tremendously, or if you were really fast on qwerty, it'll probably become as fast as qwerty
  • The dvorak layout only works for English, it doesn't really help that much in other languages, but if you are reading this, you likely speak english anyway
  • You'll have to spend quite a lot of time learning the layout, but it is well worth the effort if you ask me
  • Warning: You will have to relearn all your qwerty shortcuts, but if you're on a mac, you can use the Dvorak/Qwerty layout where whenever you press command (to enter a shortcut), the layout will be switched back to Qwerty, but this wont work in some applications like Aquamacs/Emacs and shortcuts involving the Control/Meta/Alt key
  • You'll have to relearn the location of punctuation marks and symbols like [] or /?+=-_ etc.
  • For me the total transition time was a few weeks, and when I first started, my typing speed was about 10~20 WPM (simple words per minute without any complex punctuations), yuck! But now its back to about 60~70 words per minute, although my qwerty speed was 90~100 WPM. However I'm sure that I'll be at ~100 very soon with only a couple of months of practice.
And that's about it. But I assure you that you will be better off with a layout that is faster and less stressful on your fingers.

If you have any other tips or questions on my experience with switching, please feel free to use the comments section.


Note: Yes this post was typed out in its entirety using the dvorak layout, and I bet you couldn't even tell the difference ;) I must say, that I don't think I've ever typed up a post this fast. The flow of thoughts from the brain to the keyboard was almost seamless. Although I must say, I did use the backspace button a few more times than usual because of a few spelling mistakes, but then again -- I'm still learning too.
Read More
Posted in tip | No comments

Thursday, 1 July 2010

Windows XP Mode in Windows 7

Posted on 16:33 by Unknown
If you have an application that only runs in Windows XP and you’re planning on getting Windows 7 (professional edition or greater) here is how you can emulate Windows XP on Windows 7. 

What is Windows XP Mode?

Windows XP Mode is essentially a Windows XP Virtual Machine. A virtual machine that only works for Windows XP. It runs the Windows XP operating system as though it were an application on Windows 7, but give has special “permissions” so that it can access (although not directly in the strictest sense) the hardware (CD/DVD Drive, USB drive etc. but no the actual hard drive) on you computer.
Usually when installing a virtual machine, you first need to create a virtual hard drive on your computer (which is just a file that is reserved for the virtual machine to use as a hard drive) and run the painfully long installation process (validation and all) to run an operating system. But with WXP Mode you can essentially just download the hard drive file where everything is nice and ready for you to use.

How to get Windows XP Mode

First, click the start button (the blue orb on the bottom left of the screen) and search for Windows XP Mode.

image
You will them be prompted to Download Windows XP Mode.
image
Click Download to be taken to Microsoft’s Website. Here, you’ll have to choose the options according to what you desire. If you happen to be using a browser other than Internet Explorer as your default browser, copy and paste the download in IE, as the download page may not play nice with other browsers since it requires “Windows Validation”.
However once you download and install all three components on the download page, you’ll be able to access your Windows XP installation directly from the start menu item.
Once you open Windows XP mode, you will be able to install the applications/games that only run on Windows XP and enjoy the other features that Windows 7 offers as well.
Read More
Posted in downloads, tip, Windows 7 | No comments

Top 7 new Tricks / Features (with Tips) in Windows 7

Posted on 14:54 by Unknown
Windows 7 has some great tricks up its “sleeve” that all can take advantage of. Although, you’ll Windows 7 Home Premium or greater (or “higher”) to take advantage of these tricks. Here are the top 7 features that I like in ascending order of awesomeness:

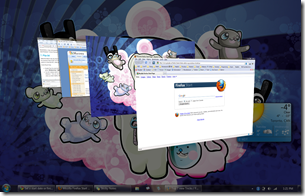
7. Flip-3d

image While this feature was also there in Windows Vista, I think that Microsoft has certainly made Windows 7 less of a resource hog so that I can actually use this feature once in a while. Instead Of Alt key +Tab key (like I used to in Vista and XP), I often press the Windows Key + Tab key now.
Some Flip-3d Tips:
  • Usually Flip-3d cycles from first window to the window behind it. If you want it to cycle the other way press: Windows key + Shift Key + Tab key
  • You don’t always need to cycle through the windows to select the windows you want. After pressing Windows + Tab, you can simply click on the window that you’d like to see on top. This works great when you have a laptop, because you can click with one hand and press the key combo with the other

6. Windows Snap

image I’m sure you all know about this feature. Simply drag a window to the edge of the screen and it snaps into place. Great if you want to have two windows side by side or if you want to maximize of minimize a window. It’s also great when you have dual monitors, and want to maximize the window (currently on monitor 1) to monitor 2 in “one fell swoop”.

5. Jump Lists

Some Tips:
  • You can also left click on an icon in the task bar and the jump list will pop-up
  • Clicking on the thumb-tack will ensure that the particular item (File/bookmark/etc…) will stay in the jumplist.

4. Improved Start Menu

With the new and improved Windows search features, you should be able to find whatever you need without a hitch. Simply click on the start menu and start typing. Sorry Launchy, but I find the start menu to be a bit more convenient.

3. Improved Touch Features/Hand writing Recognition

If you happen to have a tablet or tablet pc the Tablet PC input panel should provide countless hours of fun. To start it simply search for Tablet PC Input Panel in the start menu and off you go! Have fun!

2. Aero Shake

While transparent Windows are cool, clutter is not. Often I happen to have 40 different windows open while I only really need one, such as my browser window for example. So to quickly hide all those windows what you can do is simply shake the window that you want on the screen (sort of like the way you would drag a window, but without actually dragging it and just “wiggling” it quickly) and watch the other windows dissapear.
You’ll need the Aero theme enabled if you want to be able to do this. Here’s a video of how the Aero Shake feature works.
Although I confess that this feature is cool, I don’t usually use it that often because I don’t really find the need to do so. Or it may be that I am just lazy.

1. Awesome Speech Recognition

By far the greatest feature of Windows 7 has to be its improved (although very little) speech recognition capabilites. Learn more about this in my other article that talks about how you can set up speech recognition on Windows 7.


If you want to learn more out about other features in Windows 7, Microsoft’s website may be a good place to start.
Read More
Posted in tip, Windows 7 | No comments

Monday, 28 June 2010

File sharing, collaboration and sending big e-mail attachments?

Posted on 03:13 by Unknown
Often, it seems to be the case that the sharing and sending files with others, not to mention colloborating with others on a large project, is often difficult. And due to the fact that most e-mail providers have a limit on their attachment, it's even more hard to send large attachments through e-mail. For example, the attachment size limit for Gmail and Yahoo is only 20 MB. If you have 11 pictures of 2 MB each, you're going to have to send another email just for one photo.

Well, if you're ever confronted with a similar problem, there are actually several things you can do. In this article I'll mention only a few of the free services that I've used or know a little bit about.

Dropbox: By far one of the coolest things on the internet right now. The main purpose of dropbox is to allow you to save your files (up to 2 GB of total space, size of individual files don't matter) on the internet so that you can access them wherever you want to. But, since it allows you to save files in the internet, you can use if for back up purposes as well. Finally since it allows you to "share" files and folders with others (with the whole world or with a select group of friends that you can invite) you can also share files that would otherwise make for some very large attachments. Definitely the first thing you should check out.

Windows Live SkyDrive: This free service from Microsoft allows you to store files on their servers so that you can share it with others. It provides 25 GB of space, specifically for this purpose but upload size for each file is limited to 50 MB. Certainly worth checking out, especially for photos, since it also provides a great gallery feature and integrates nicely with other Windows services such an Windows Live Photogallery.

Yousendit: Like some of the other free webhosting services, yousendit allows you to upload your file, and sends that link to your friend so that they can download it via yousendit. While yousendit only stores the file for some days, it might be worth it since no actual sign up is necessary.

Office Live Workspace: While not strictly a file sharing service, office live workspace works great for sharing documents with others, and allows up to 5 GB of storage space. While it does requrie you to have an office live addin for some features, it is great for colloboration. It allows you to allow multiple users to edit a document, add comments and has features like todo lists and so on.
Read More
Posted in email, file sharing, internet, tip | No comments

Sunday, 27 June 2010

Locking Your Mac Instead of Logging Out

Posted on 19:57 by Unknown
Unfortunately, it isn't possible to lock your Mac as easily as one can lock their Windows computer (by pressing the Windows Key + L key) by default. It takes a little bit of setting up, but once you set it up, you can lock your computer with a flick of the mouse (really).


The way to lock your computer on a Mac is a rather long winded one in theory. What you need to do is put your display to sleep, and then through the security section of the system preferences window, set your Mac to ask you for a password by after the screen saver begins.

To do so, it'll be convenient to create an active corner for a putting your display to sleep first. Follow this tutorial if you need help on how to do so, and set the option for "Put display to sleep" to a particular corner of your choice. Then open system preferences again, and click on Security. Check the box that says "Require a password ______ after sleep or screen saver begins". For the time option, I usually use five seconds, in case I accidentally trigger the active screen corner, putting my display to sleep and locking my computer.


And you're done. When you need to lock your computer, just move your mouse to the screen corner that you set and walk away from your computer (only for a short time I hope) knowing that it is safe from prying eyes. Plus, you are saving energy, as insignificant as it may seem, and helping the environment.
Read More
Posted in Mac, tip | No comments

Sunday, 23 May 2010

Sending Scheduled Emails through Apple Mail

Posted on 00:03 by Unknown
One nice feature missing in most email providers' web interfaces is the ability to schedule your email and send it at a later time. Unfortunately, Gmail doesn't even have a labs feature yet that will allow you to automatically send a scheduled email at a later date.

Of course, you can use your favourite calendar system to send the email, but what if you aren't actually going to be at your computer? It makes much more sense to allow your computer to send the email for you automatically.

To do so, you'll often need the help of an external utility or script on your computer to do the job for you. Apple Mail is great candidate for sending out automatic scheduled emails on a Mac. But Mail.app can't do this alone, it needs the help of some scripts, namely the Schedule Delivery script available in Mail Scripts, and iCal.

How to set up automatic delivery of email with Mail Scripts

First, get the Mail Scripts download for your version of Mail (at the time of writing, the latest version available was 2.10.2) from Andreas Amann's website. After you download it, double click on the .dmg file and let the installer install the necessary scripts.

Then open up AppleScript Editor (found in Applications > Utilities > AppleScript Editor.app) and click on Preferences in the menubar. Then in the General tab, check the box beside "Show script menu in menubar" to see a partially opened scroll icon on the menubar.

You'll have to use the Scroll to access the scripts.

Now, open up Apple mail, and write up a draft of the message you'd like to send (or may be you have a draft of the message already). Click on the scripts icon, and under "Mail Scripts" select Schedule Delivery. Fill in the desired time and date for the delivery of the mail and choose the draft that you'd like to send. And click Update.

You're set! At the right time, mail scripts will do its job (provided your computer is turned on) and save the day.

Of course, a couple of caveats: this method depends on your computer being turned on. A power outage/dead battery/accidental file corruptions/bad wifi connection/bad internet connection would mean that the message will not be sent, so choose the messages you'd like to schedule wisely.
Read More
Posted in apple, tip | No comments

Thursday, 29 April 2010

Deleting Multiple e-mail messages on a Blackberry

Posted on 08:41 by Unknown
Another thing that I've recently discovered is how to delete multiple messages from a blackberry. Instead of having 500 emails on my phone, I'd rather just have the most important emails and delete the rest. But until now I was just deleting the e-mails manually, one by one, pressing the delete button in the e-mail list to delete the e-mails. However, it seems like there's a faster way to delete several e-mails together.


Interestingly enough deleting several messages (e-mails or call messages) on the blackberry is the analog of doing so on the computer (where one holds the shift key or ctrl/cmd key to select multiple things). One simply needs to:
  • Hold down the Shift Key (the one on the bottom row, to the left most or right most side of the keyboard with the aA symbol)
  • Scroll along with your trackball to select messages (hah, take that touch screen phones... let's see you do this! well actually it is quite possible)
  • Press the Delete key (the one that says del with the left arrow)
  • Choose your option (your blackberry will choose Cancel as the default if you do this... instead of automatically going on your preferred option):
    • Either delete it from your handset
    • Or delete it from the server too
  • Enjoy your empty/skimmed down inbox!
And there you have it. No longer will you have to scroll through the spam and facebook messages to reach that important email.
Read More
Posted in blackberry, phones, tip | No comments

Wednesday, 17 February 2010

Go Canada Go! Watching Olympics Online

Posted on 15:23 by Unknown
I must say, after seeing Canada beat Norway 8 - 0 (and the No way Norway posters held up by spectators who paid $1500 CDN for a round robin game), hockey definately seems to be Canada's sport.

 I for one am proud to have the maple leaf on my desktop :D

Oh, and how do you watch the 2010 winter olympics online you ask?

CTVolympics.ca seems to be the best bet for Canadians and people from other countries I'm hoping. Their player does use Silverlight
though, but I've tried it with Moonlight (Silverlight's open source cousin) and it seems to work alright. NBColympics.com and Vancouver2010.com also have videos, but they don't seem to be streaming things live.


Wait... 5 - 0 in the first period? Something doesn't seem right. The score must be wrong or something!

Back to my thoughts on hockey:

Interestingly enough, I was taking the hockey quiz on vancouver2010.com and came across a question that asked about Canada's previous records. And turns out that there are some highly unbelievable numbers. Take a look yourself:

 
33 - 0 !! That's just insane.
Read More
Posted in online, tip, video, web | No comments

Sunday, 7 February 2010

Using Speech Recognition in Windows 7

Posted on 10:12 by Unknown
If there’s one area where Windows is way ahead of every other operating system in the world, it has to be Speech Recognition. There is no other operating system that I can think of right now that has the inbuilt capability to browser websites (yeah, Windows can recognize the text in images too…) through speech recognition without having to download anything. Sure, it’s buggy, but I’m sure that voice will soon become the preferred method of interfacing with the computer along with touch.

But enough of the history and theory, here’s how you too can start using Speech Recognition to give commands and dictate to your PC.

Setting up Speech Recognition in Windows 7 – Step by step

  1. Plug-in your microphone (or don’t worry about it if you have a fairly good inbuilt microphone). Your mileage may vary with Bluetooth microphones (most of the time, windows will refuse to accept a wireless Bluetooth microphone, because it just isn’t ready for that yet).
  2. Click Start
  3. Search for “speech recognition” and click on Windows Speech Recognition
  4. If this is your first time using Speech Recognition (it likely is, since you’re reading this), a Microphone Setup Wizard will pop-up, asking you to do some stuff
  5. imageFollow the instructions, and after your microphone is set up, Windows will walk you through the set-up process (where I’ll see how you speak and tell you how to speak to your computer). Warning: This might take 15 mins – 30 mins (depending on how good you are at reading and saying stuff out loud). But if you’re new to this, don’t worry, Windows will walk you though.
  6. Try to pay attention during the tutorial, it’ll tell you everything you need to use Window’s Inbuilt Features
  7. After you’re done the tutorial, just click the microphone on the Windows Speech Recognition Bar, and watch the Microphone button glow blue. Now you’re ready to speak… to your computer!
image
That’s all there is to it. A few words of caution though:
  • Dictating to your computer might sound easy, but you’re computer certainly isn’t a human, and chances are that it will only understand you most of the time, missing difficult to interpret words.
  • Be careful when you are talking to someone else and your microphone is turned on.
  • I find that composing your dictation in a program such as Wordpad or Microsoft Word is better than composing in a program like outlook or in a web browser.  You can compose things in Wordpad and then just copy and paste them wherever you want.
  • Make sure you use the correct command instead of typing things on your own, windows learn from it and become better (hopefully).

And that's all there is to it! Have fun. If enough people want it, I might post an article on Speech Recognition tips later on.
Read More
Posted in tip, Windows 7 | No comments

Friday, 5 February 2010

How to increase the number of recent files for each Application in Start Menu

Posted on 14:52 by Unknown
One of the new features I like in Windows 7 is being able to find the most recently used files for an application right through the Start menu. No longer do I have to open up several files I worked on recently by opening a new Windows Explorer window every time. Not only does this save time by cutting out steps, it also means that I don’t actually need to remember where I stored the file (unless if I have to transfer it to my USB or email it).
If you haven’t used this handy feature yet, try it!

Open your start menu, and hover over the arrow beside, say Microsoft Excel, and a list of files you’ve recently used will pop-up under the recent section. Neat huh?
image
Note: If the applications you use most recently have not already been placed (or pinned) to your start menu, simply right click on the application in the start menu and select: pin to start menu.
image
But the sad thing is, that if you work on a lot of files at the same time, Windows is not smart enough to show you more than a certain number of files by default (even though your start menu might have plenty of space to show it). It’ll only show a few entries. Luckily though, there is a way to tweak this.
  1. Right click on Taskbar
  2. Click Properties
  3. Choose the Start Menu tab
  4. Click Customize
  5. Under the Start Menu size box, you can increase the number of recent files and number of recent items to display in jump lists to whatever you wantimage
And that’s all there is to it. Enjoy finding your files with ease, especially if you have a messy desktop like me.
Read More
Posted in tip, Windows 7 | No comments

Saturday, 16 January 2010

Searching from Firefox Address Bar (like Chrome)

Posted on 18:36 by Unknown
While I love the concept of being able to search and access websites from only 1 single address bar, Google Chrome isn't exactly the best browser for me. There's only one reason for that though - it doesn't have the same extension support as Firefox. So Xmarks and AdBlockPlus aren't fully functional (for now) on Chrome.

But why fear when you have high speed internet and Firefox. You can almost (say almost... because you can't always search, as I mention below) get the same functionality of being able to search from the address bar (this is the place you usually type in www.google.com!) like in Chrome without having to download add-ons and other random things. Of course, given the fact that Google has no stake in Firefox, it'll still load Google owned websites, or half of the internet, really slowly. But chances are a few nano-seconds won't make all too much of a difference, especially if you are like me and love to waste time on the interwebs. Of course, you can also tweak Firefox to become an internet hog and load web pages faster.

How to enable Firefox address box search

Enabling Firefox searches is really trivial. All you need to do change certain default configurations in Firefox. Here's how to do it so that you can make Google your default search engine:
  1. Open a New Firefox window (so that you can still read these instructions, duh!)
  2. First type in about:config in the Firefox address bar
  3. Yes. You're about to void the warranty on your browser install. Click on "I'll be careful, I promise."
  4. Type in keyword.URL in the "Filter:" box
  5. Double Click on keyword.URL in the Preference Name area
  6. To use Google search (I've provided some other providers below), type in (or copy and paste):
    http://www.google.com/search?q=
  7. Hit OK
  8. Type in a search query in the address bar to check it out!
Now, you can enjoy your new found search-abilities! If at anytime you wish to reset your Firefox address bar, simply follow the same instructions above up till step 4, but instead of double clicking on keyword.URL, simply right click and click Reset.

Changing search providers for Firefox address bar search

In the above instructions, I provided the search string for Google. But naturally, you can do the same for any other search provider. For instance here are a few things you'd copy and paste when Firefox asks you a new value for keywork.URL in step 6 of the instructions above.
  • Yahoo:
    http://ca.search.yahoo.com/search?p=
  • Bing:
    http://www.bing.com/search?q=

  • Wikipedia:
    http://en.wikipedia.org/wiki/Special:Search?search=

  • Google's I'm Feeling Lucky Feature (this will take you directly to the first web page in a conventional Google search):
    http://www.google.com/search?btnI=I%27m+Feeling+Lucky&q=

How to get rid of the existing search box

Getting rid of the existing search box (yeah you likely won't need this anymore) is easy. Just right click near your address bar and click Customize. Then drag the existing search box in to the Options window and you're done. This will now make your Firefox look like Google Chrome!

Custom Search Providers

Creating custom search providers is easy. What Firefox does is simply appends the user's string (the stuff the user types into the address box) to the keyword.URL string value. So, all you need to do is make sure that the keyword.URL string value will cause a search query after Firefox adds the user's search strings and forms a complete URL and goes to that website. In essence, it is merely a matter of finding the keyword.URL string. To do this simply create a few different searches on your desired website and observe the changes in the URL caused by the search. So for Beyond Teck's custom (Google based search engine), every search string gets added after the "q=" part of the URL. So naturally, the keywork.URL string for BeyondTeck's search engine will be all the stuff in the URL before the "q=" part, so it will be:

http://www.google.com/cse?cx=partner-pub-7450531327125251%3A1037qo-kfo1&ie=UTF-8&q=

Stuff you cannot search for from the Firefox Address box

Unlike Chrome, Firefox does have some restrictions for its "search strings" or things that you can search for. Here's a little list (to be continued as I find more things you cannot serach for):
  • Cannot search for things that begin with certain special characters, particularly a "/". So you cannot search for "/..com".
  • You cannot search for a term that begins with "about:" because that term (as in about:config or about: or about:cache) just takes you to Firefox's advanced configuratgion/about/cache pages.
  • You cannot search for things like "define:" because it has a colon in there
Read More
Posted in firefox, google, search, tip | No comments

Sunday, 18 October 2009

Adding a deskbar to Ubuntu 9.10's panel to search files and other things

Posted on 09:50 by Unknown
Interestingly enough, my trusty deskbar applet seems to have gone missing in this latest flavour of Ubuntu 9.10 (aka Karmic Koala). Usually, you would be able to right click on the main panel (The bar on the top of the screen that has Application, Places and Systems and so on) and add the panel called "Deskbar" to your computer.

Why deskbar you ask? Because deskbar is to ubuntu as spotlight (or Windows Start menu search) is to Mac OS X (or Windows 7). It helps you quickly find the files that you need on your Ubuntu partition or your PC partition, and helps you do stuff like quick math, searching the dictionary and searching the Interwebs.

So anyway, turns out that you have to install deskbar manually on 9.10. To do so, open a terminal window and install it by hand.
  1. Click Applications > Accessories > Terminal
  2. Type in


    sudo apt-get install deskbar-applet
  3. Type in your password if Ubuntu asks you for one
  4. Restart gnome panel by typing in (note: typing in gnome-panel after the first line may not be necessary, as ubuntu is smart enough to restart it automatically!):


    killall gnome-panel
    gnome-panel
  5. Then right click on the panel where you'd like deskbar, Click Add to Panel, drag and drop deskbar whever you like
Oh, and you might want to remember the handy shortcut Alt+F3 to access deskbar if you need to.
    Read More
    Posted in Linux, tip | No comments

    Friday, 25 September 2009

    Unable to find an application to support "mailto" navigation

    Posted on 17:59 by Unknown
    While using Windows 7 (professional edition) I ran across this little bug that might cause you a lot of grief. The reason I ran across this bug was because I was trying to use Microsoft Groove to send "my contact info" via e-mail. However the error kept coming up whenever I tried to use the "mailto" link in groove.

    I'm also assuming that this is the case for any mailto: link that might be in an address across the operating system. This error has most likely resulted because Microsoft decided to ship Windows 7 (which most people will be getting on October 22nd by the way) without a mail client. Therefore, Microsoft presumed that people will download Windows Live Mail or something else like Thunderbird for their e-mail needs.

    In my opinion letting the users choose their desired mail program (instead of something like having Windows Mail in Vista and most people downloading Windows Live Mail because it was superior to Windows Mail anyway... causing a duplication of effort) is a good idea. But this also means that the operating system for some reason doesn't have a 'Default' mail program to go to in order to open mailto: links.

    As such, to open mailto links, you'll first need to set Windows Live Mail or whatever else you plant to use as your default mail program.

    How to set an application as the default mail program in Windows 7 (and solve the mailto problem)

    1. Click on Start
    2. Click on Default Programs
    3. Click on 'Set program access and computer defaults'
    4. Click on the chevron (arrows) beside "Custom"
    5. Under "Choose a default e-mail program:" choose 'Windows Live Mail' or any other program you wish to use. If you don't have any other program under the options, you probably need to download and install one. I'd recommend you give Windows Live Mail or Thunderbird a try.
    6. Click OK.
    7. Close the window
    8. Try clicking on the mailto link again.
    This time it should work as it was supposed to!
    Read More
    Posted in error, tip, Windows 7 | No comments

    Friday, 18 September 2009

    Open PDF files inside Firefox on Macs

    Posted on 17:05 by Unknown
    One thing that I find annoying on a default Firefox installation is opening PDF files. Interestingly enough Safari seems to open them fine right inside the browser. However, Firefox by default requires you to download the PDF file first and then open it.

    The downside to this of course is that if you need only simply "view" several files a day, each file you view adds to the clutter of the "download" folder on your computer. Of course, when you have a mix of necessary PDF downloads and unnecessary "temporary" downloads, the result is not optimal.

    On the other hand, Firefox does have a plugin for Intel or PowerPC macs which will enable inline PDF viewing, a great tool if you view a lot of PDFs in a day. Simply go to https://addons.mozilla.org/en-US/firefox/addon/7518 to install the plug-in for Firefox.
    Read More
    Posted in addons, downloads, firefox, Mac, tip | No comments

    Thursday, 3 September 2009

    Fix the “programs still need to close” problem in Windows 7

    Posted on 15:25 by Unknown
    ProgramsStillNeedtoClose
    One sad thing about Windows 7 is that sometimes, it gets a little confused. Especially if you have applications like Norton or any similar anti-virus programs (which Windows 7 still needs by the way) installed.  And often, when you try to restart or shut down your progam, you’ll get a window that says:

    Programs still need to close – Force Restart or Cancel

    Of course, the easy way out of this would be just to click Force Restart all the time. Plus, if you see an open Microsoft Word document that you forgot to save, this screen will no doubt remind you of something you’d better save before restarting. But that won’t help when you don’t have any programs that you can save data in.
    The ideal solution in such cases, in my opinion, would be to wait for a couple of seconds till the notorious programs close and then restart. But if you’re running something like Norton that doesn’t seem to be the case.

    However, fear not! Because Windows 7 is still Windows, there are some great tricks were discovered 10 years ago, namely registry hacks, that can still be applied to Windows 7.
    So without further ado:

    How to automatically force restart your Windows 7 computer for a 1-click-quick-restart experience

    Okay, yes, I really am that lazy. An extra click sucks. Nevertheless, it might save you time. So here’s how you can tweak your registry to force a restart as soon as possible. Essentially, what you need to do is set the ‘WaitToKillServicesTimeout’ parameter to a very low number so that the computer will kill (in terms of code execution of course) any open programs quickly and move on.
    1. Log in with an administrator account
    2. Click Start (blue windows orb)
    3. Type in regedit where it says search in the start menu and click on it when it shown up in the start menu
    4. Then, using the columns on the left hand side, navigate to HKEY_LOCAL_MACHINE > SYSTEM > CurrentControlSet > Controlimage
    5. On the right hand side, double click on WaitToKillServiceTimeout
    6. Type in 1000 (this will set the time to 1000 ms (which = 1s)) in the box that pops up, under ‘Value Data’
    7. image
    8. Click OK
    9. Close Registry Editor
    10. Restart your computer (note you might still get the force restart button this time, but you won’t ever get it after you restart).
    Then, simply enjoy the faster restarts/shutdowns! But make sure you remember to save your work before you click on shutdown or restart!
    Read More
    Posted in hack, Registry, tip, Windows 7 | No comments

    Saturday, 8 August 2009

    How to enable Hibernation on a Mac

    Posted on 07:01 by Unknown
    Did you know that you can still "hibernate" your mac (as in shut down the machine and save all the information in your ram to your hard drive) instead of just putting it to sleep (where the ram is still powered on, and the machine can randomly wake up when it detects change)?

    Turns out that Macs also have the hibernate feature. Except, it's not available by default. This is most likely because Apple just wants you to use their sleep feature instead of shutting down the computer all together.

    Nevertheless, ever since OS X 10.4.3, all Macs can go into what is called 'Deep Sleep'. How you ask? Very simply put, all you need to do is use this widget called Deep Sleep. Once it's installed (and authenticated) merely clicking on the widget will put your Mac into a deep zzz... To install all you need to do is download it and agree to the prompt that asks you to Install the widget. Then, for your first use, just open Dashboard, and click on the widget. The first time you use it, you will have to authenticate it by providing your administrator password. Thereafter, all you need to do is just click on the moon!

    Note: If you have a Intel machine, it should work flawlessly. However, if you have an older PPC machine, you'll have to read the user manual to see if you're in luck.

    Alternatively, you can also tinker around with the Terminal if you wish to do so. Normally, this is what the mac uses:

    sudo pmset -a hibernatemode 3

    However, you can change it to:

    sudo pmset -a hibernatemode 1

    to enable DeepSleep.

    Happy Zzzzzing!

    On a side note: the way I came across this feature by "accident" was when my battery ran out of power. So I removed the battery from the computer and plugged in the computer without the battery installed. Interestingly enough, the computer booted into a state that was exactly they way I left it before my reserve battery power ran out. Knowing this fact piqued my curiosity regarding a possible Windows like hibernate feature on the mac, leading to the discovery of the wonderful widget.
    Read More
    Posted in downloads, free, Mac, tip | No comments
    Older Posts Home
    Subscribe to: Posts (Atom)

    Popular Posts

    • WeTransfer Job Ad
      I like using WeTransfer to transfer things that don't fit in emails, mainly because the site is fast, has a large upload limit (2GB!) an...
    • Improving engine life and saving gas by putting your car on neutral at the lights
      You might have read my article about how my friend told me that putting your car on neutral while going downhill saves some gas and my tho...
    • Contact Me!
      Okay so you want to contact me for something? No Problem! E-Mail You can send all your questions , comments , tips (I need a lot of those)...
    • Fix the “programs still need to close” problem in Windows 7
      One sad thing about Windows 7 is that sometimes, it gets a little confused. Especially if you have applications like Norton or any similar a...
    • Google Easter Egg: Change your language to Bork! Bork! Bork!
      Just recently I was watching a video of Marissa Meyer talking about how Google goes about optimizing their site to incease performance and u...
    • How to find out if a .exe process is spyware or virus
      Windows XP has thousands and thousands of .exe files, and usually a lot of those executables are running at any given time. But are all of t...
    • Top 6 Gmail Tips
      Gmail is probably one of the best free webmail services out there given the enormous number of features it has. Plus, chances are good that ...
    • Free up some more hard drive space on your Windows 8 installation
      I've been using Windows on my mac quite often recently, and although I had budgeted 65 GB of my precious SSD space to windows, it seems ...
    • iPhone Searching... No Service/No Reception Problem
      Short answer: Turn of iMessages and try sending a text message to yourself to see if you get your network connection back. Explanation: Th...
    • Using Speech Recognition in Windows 7
      If there’s one area where Windows is way ahead of every other operating system in the world, it has to be Speech Recognition. There is no ot...

    Categories

    • addons
    • adobe
    • ads
    • adsense
    • apple
    • audio
    • blackberry
    • blog
    • blogger
    • blogging
    • cars
    • cellphones
    • clean
    • code
    • comments
    • cricket
    • downloads
    • ebooks
    • email
    • error
    • file sharing
    • firefox
    • fixes
    • free
    • games
    • gas
    • Gmail
    • google
    • hack
    • hotmail
    • installs
    • instant messaging
    • internet
    • internet explorer
    • ipod
    • laptop
    • Linux
    • Live Writer
    • lol
    • Mac
    • mac. mail
    • mail
    • messenger
    • microsoft
    • Microsoft Word
    • money
    • msn
    • music
    • Musings
    • network
    • news
    • online
    • Outlook
    • page
    • peripherals
    • phones
    • photo
    • photoshop
    • php
    • plagiarism
    • problems
    • productivity
    • programming
    • projects
    • rant
    • Registry
    • Review
    • school
    • Screenshots
    • search
    • security
    • software
    • spam
    • speech
    • speed up windows
    • spyware
    • sysfader
    • technology
    • tip
    • tricks
    • tutorials
    • ubuntu
    • updates
    • video
    • virus
    • voip
    • web
    • wi-fi
    • Windows
    • Windows 7
    • Windows Vista
    • Windows XP
    • wireless
    • work
    • wtf
    • youtube

    Blog Archive

    • ▼  2013 (5)
      • ▼  October (2)
        • WeTransfer Job Ad
        • iPhone Searching... No Service/No Reception Problem
      • ►  August (2)
      • ►  March (1)
    • ►  2012 (6)
      • ►  December (1)
      • ►  October (1)
      • ►  June (1)
      • ►  May (1)
      • ►  January (2)
    • ►  2011 (19)
      • ►  October (1)
      • ►  August (1)
      • ►  July (8)
      • ►  June (1)
      • ►  February (4)
      • ►  January (4)
    • ►  2010 (41)
      • ►  November (1)
      • ►  October (3)
      • ►  September (3)
      • ►  August (2)
      • ►  July (12)
      • ►  June (2)
      • ►  May (5)
      • ►  April (3)
      • ►  March (4)
      • ►  February (4)
      • ►  January (2)
    • ►  2009 (59)
      • ►  December (1)
      • ►  November (1)
      • ►  October (1)
      • ►  September (3)
      • ►  August (4)
      • ►  July (4)
      • ►  June (14)
      • ►  May (1)
      • ►  April (3)
      • ►  March (3)
      • ►  February (4)
      • ►  January (20)
    • ►  2008 (108)
      • ►  December (22)
      • ►  November (10)
      • ►  October (14)
      • ►  August (13)
      • ►  July (13)
      • ►  June (6)
      • ►  May (13)
      • ►  April (10)
      • ►  March (5)
      • ►  January (2)
    • ►  2007 (33)
      • ►  December (8)
      • ►  November (1)
      • ►  October (4)
      • ►  September (10)
      • ►  August (1)
      • ►  July (2)
      • ►  June (1)
      • ►  May (2)
      • ►  April (1)
      • ►  February (2)
      • ►  January (1)
    • ►  2006 (137)
      • ►  December (1)
      • ►  November (1)
      • ►  October (1)
      • ►  August (1)
      • ►  July (3)
      • ►  June (9)
      • ►  May (20)
      • ►  April (22)
      • ►  March (33)
      • ►  February (20)
      • ►  January (26)
    • ►  2005 (55)
      • ►  December (12)
      • ►  November (19)
      • ►  October (9)
      • ►  September (15)
    • ►  2001 (1)
      • ►  January (1)
    Powered by Blogger.

    About Me

    Unknown
    View my complete profile